- Rebuild the Cenotaph model in 3Ds Max
- Apply material in 3Ds Max
- Model the light Feature (SUN feature) in 3Ds Max
- Import the model to Crysis Editor from 3Ds Max
- Create and arrange the hedges on Centaph in Crysis
- Create and apply material for Cenotaph in Crysis
- Final Video Editing
- Update the Team Blog
Saturday, May 9, 2009
Assignment 2 Contribution


Wednesday, May 6, 2009
Challenges during the design process
Challenges during the design process
We have faced many troubles and frustrations during the whole project development, including the technical problems and also the collaboration; yet they all have been solved and finally we get our model done quite well. It is necessary to record the challenges or faults, as they can remind us not to let the mistakes happened again, also keep a record of our design process.
1. Collaboration with ‘New’ team member
Collaborate with someone never work together before or even totally stranger, is always happens in the real world. Our team members in this studio were picked randomly by choosing number tickets from a ‘Hat’, which is a really good experience that I can work with someone that I never work together before, and learn how to communicate and expressing myself. I think our team are working a bit harder than the other group, as Gordon – one of our team members- is living in Perth, so we cannot meet up quite often and only rely on phone or e-mail. Yet Gordon is a really good partner to work with as he is responsible and smart, so the distance does not make our process too difficult. And the other group mates Joanne and Michael, they are also helpful and funny, I had so much fun to work with them. We assigned the work evenly according to our strengths, which let our design process smoother and efficiently.
2. Building the model
We have the most challenge on building the model as we do not have the accurate measurement or any detail about the Cenotaph. To get the nearest result, Joanne built the model in ArchiCAD by the following the scale of the imported section of Cenotaph picture; yet it seems not looking very good after we imported it into 3Ds Max, so I rebuilt the model again in 3Ds Max by using Joanne’s Model as a reference, and add more detail to it, then the model looks quite well and achieved the sense of elegant.
3. Import from 3Ds Max to Crysis
Micheal and I spent nearly two days for importing the model from 3Ds Max to Crysis and we were quite frustrated because somehow it did not work well.
The first challenge is the SDK plug in does not support 3Ds Max 2009 which I used to built the model; so I have to
C:\Program files\Electronic Arts\Crytek\Crysis\Game\Objects
- Group all objects and Name it the same name you just saved it as
- Select the whole object and go to Utilities on the left hand side tool bar, choose the cry engine exporter
- add selected
- Choose ‘Export to Geometry (*.cgf)”
- Then click ‘Export Nodes’ to
C:\Program files\Electronic Arts\Crytek\Crysis\Game\Objects
- Go to objects in your roll over menu (right hand side)
- Select Brush
- Your new object you just exported should be in the list
- drag it into your terrain
However, when we try to import the model to crysis, we found that the material I made in 3Ds Max does not work in crysis editor; and also some elements does not show in the editor correctly because of too many vertices. So I spit the model into parts according to their materials, and do the steps above again.
We have faced many troubles and frustrations during the whole project development, including the technical problems and also the collaboration; yet they all have been solved and finally we get our model done quite well. It is necessary to record the challenges or faults, as they can remind us not to let the mistakes happened again, also keep a record of our design process.
1. Collaboration with ‘New’ team member
Collaborate with someone never work together before or even totally stranger, is always happens in the real world. Our team members in this studio were picked randomly by choosing number tickets from a ‘Hat’, which is a really good experience that I can work with someone that I never work together before, and learn how to communicate and expressing myself. I think our team are working a bit harder than the other group, as Gordon – one of our team members- is living in Perth, so we cannot meet up quite often and only rely on phone or e-mail. Yet Gordon is a really good partner to work with as he is responsible and smart, so the distance does not make our process too difficult. And the other group mates Joanne and Michael, they are also helpful and funny, I had so much fun to work with them. We assigned the work evenly according to our strengths, which let our design process smoother and efficiently.
2. Building the model
We have the most challenge on building the model as we do not have the accurate measurement or any detail about the Cenotaph. To get the nearest result, Joanne built the model in ArchiCAD by the following the scale of the imported section of Cenotaph picture; yet it seems not looking very good after we imported it into 3Ds Max, so I rebuilt the model again in 3Ds Max by using Joanne’s Model as a reference, and add more detail to it, then the model looks quite well and achieved the sense of elegant.
3. Import from 3Ds Max to Crysis
Micheal and I spent nearly two days for importing the model from 3Ds Max to Crysis and we were quite frustrated because somehow it did not work well.
The first challenge is the SDK plug in does not support 3Ds Max 2009 which I used to built the model; so I have to
- export the model from .max to .3ds format in 3Ds Max 2009
- Then import the .3ds file to 3Ds Max 2008
- Use SDK plug in to save the model as .cgf format
C:\Program files\Electronic Arts\Crytek\Crysis\Game\Objects
- Group all objects and Name it the same name you just saved it as
- Select the whole object and go to Utilities on the left hand side tool bar, choose the cry engine exporter
- add selected
- Choose ‘Export to Geometry (*.cgf)”
- Then click ‘Export Nodes’ to
C:\Program files\Electronic Arts\Crytek\Crysis\Game\Objects
- Import to crysis by the following steps:
- Go to objects in your roll over menu (right hand side)
- Select Brush
- Your new object you just exported should be in the list
- drag it into your terrain
However, when we try to import the model to crysis, we found that the material I made in 3Ds Max does not work in crysis editor; and also some elements does not show in the editor correctly because of too many vertices. So I spit the model into parts according to their materials, and do the steps above again.
Hedges
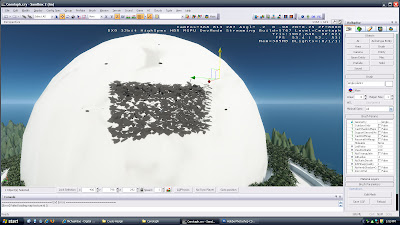
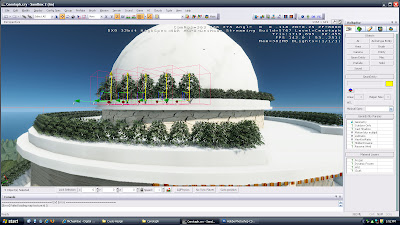
In the orginal design there are some hedges surrounding each level of Cenotaph. Firstly, I made the hedges in 3Ds Max, however it cannot be imported into Crysis because of too many vertices. So I used the tree in GeomEntities in Crysis Editor, clone and rotate each of them to make them fit the edge of the slabs. And I also double the layer for each hedge, in order to create a rich density for the hedges to match with the original design.
ps. The reason that I didn't use the trees in vegetation is, because the trees in vegetation category are only allow to place on the ground,which cannot fulfill our needs.
Hedges in 3Ds Max

The material of the hedges lost after imported to Crysis from 3Ds Max
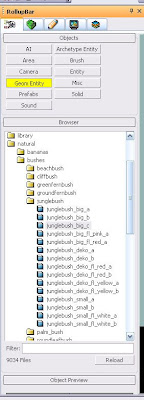
In Crysis Editor, the Geom Entities Under thr roller bar
Snap shot of how I clone and rotate the hedges in Crysis
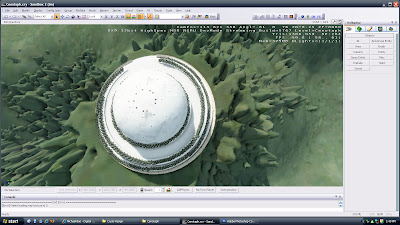
The top view of Cenotaph after applying the hedges
ps. The reason that I didn't use the trees in vegetation is, because the trees in vegetation category are only allow to place on the ground,which cannot fulfill our needs.
Hedges in 3Ds Max

The material of the hedges lost after imported to Crysis from 3Ds Max

In Crysis Editor, the Geom Entities Under thr roller bar

Snap shot of how I clone and rotate the hedges in Crysis

The top view of Cenotaph after applying the hedges

Sunday, May 3, 2009
Process of applying material in Crysis
Michael and I were quite struggling about the material part, because the material I made in 3Ds Max can not be imported into Crysis successfully, so we decided to make the material in Crysis Material Editor.
Selected materials:
(Sphere Exterior)
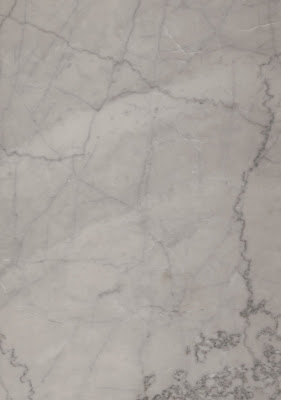
Option 1 : White Marble (Selected as Final)

Option 2: botticino grey marble
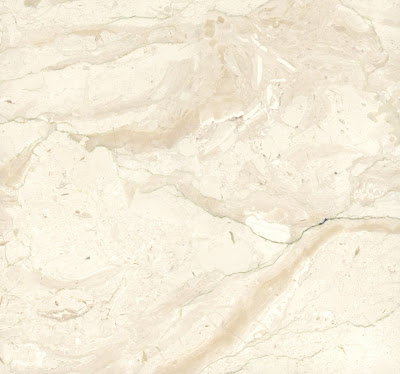
Option 3: MW Beige, marble
(Rafters)
Dark Wood

(Base of Cenotaph)
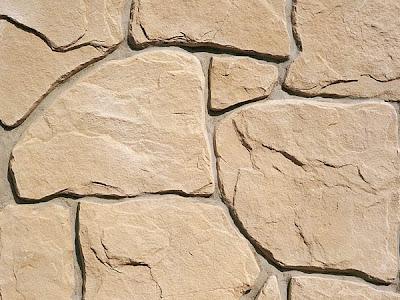
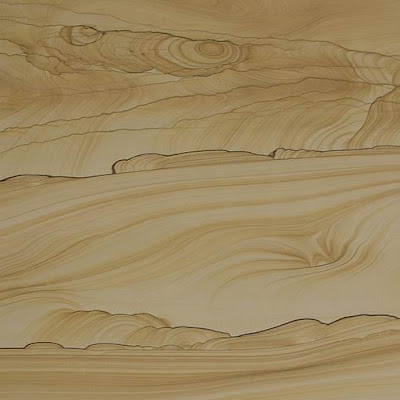
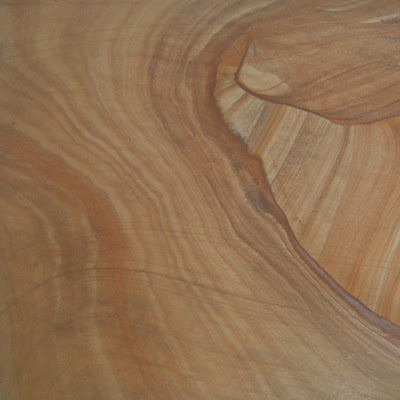
Option 1: Sandstone shape (Selected as Final)
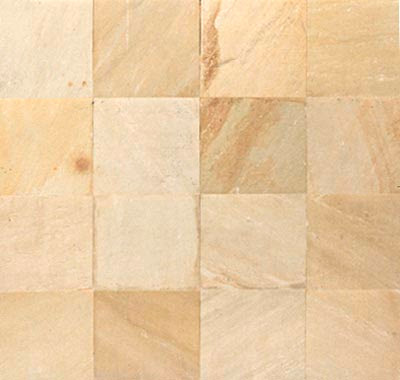
Option 2: Sandstone Tiles
Option 3: sandstone scenery
Option 4: Sandstone shape
Steps for importing custom texture to crysis:
1. Create a folder named "textures" inside your project folder, inside of crysis
(figure 1)
(Figure 2)
3. In Material Editor, there are some very useful settings which can create the most suitable material for our design. Including:
Diffuse - simply mean the appearance of the material. We apply the custom images on by clicking the right button next to the bar, and select the .dds image.
Under the 'Diffuse', there is a category called 'Rotator", which can make the texture rotate constantly. We used this function on the material of the light feature.
Bump - texture/ surface of the material. it also need to apply a image to in order to create a bumpy surface. lighter area of the image will be raised and darker area of the image will be appear as deeper. value range from 0-100
Here are some snap shot of the process of testing and creating the material in Crysis Material editor.

ps I found a quite useful sandbox editor manual on the web which help us a lot during the process of editing the material.
http://doc.crymod.com/SandboxManual/frames.html?frmname=topic&frmfile=index.html
Selected materials:
(Sphere Exterior)
Option 1 : White Marble (Selected as Final)

Option 2: botticino grey marble

Option 3: MW Beige, marble

(Rafters)
Dark Wood

(Base of Cenotaph)
Option 1: Sandstone shape (Selected as Final)

Option 2: Sandstone Tiles

Option 3: sandstone scenery

Option 4: Sandstone shape

Steps for importing custom texture to crysis:
1. Create a folder named "textures" inside your project folder, inside of crysis
eg. C:\Program Files\Electronic Arts\Crytek\Crysis\Game\Levels\Cenotaph\Textures
- Save the new texture as a material file (*.mtl)
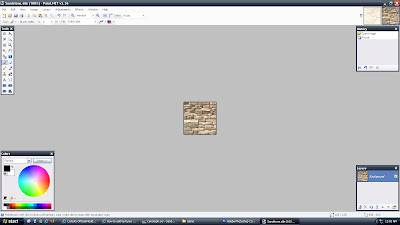
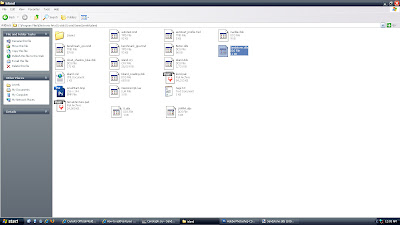
- The material editor in Crysis only support .dds format picture, so we use 'paint.net' a image converter to convert our selected images from .jpg to .dds (figure 1)
- Also the size of the images must be 128X128 pixels in order to import to crysis successfully. And place the .dds image to the folder just create in step 1 (figure 2)

(figure 1)

(Figure 2)
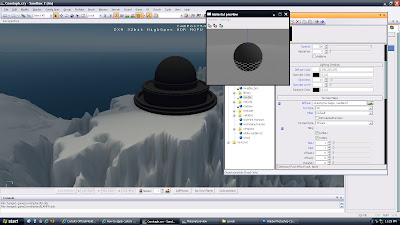
3. In Material Editor, there are some very useful settings which can create the most suitable material for our design. Including:
Diffuse - simply mean the appearance of the material. We apply the custom images on by clicking the right button next to the bar, and select the .dds image.
Under the 'Diffuse', there is a category called 'Rotator", which can make the texture rotate constantly. We used this function on the material of the light feature.
Bump - texture/ surface of the material. it also need to apply a image to in order to create a bumpy surface. lighter area of the image will be raised and darker area of the image will be appear as deeper. value range from 0-100
Here are some snap shot of the process of testing and creating the material in Crysis Material editor.


ps I found a quite useful sandbox editor manual on the web which help us a lot during the process of editing the material.
http://doc.crymod.com/SandboxManual/frames.html?frmname=topic&frmfile=index.html
Saturday, May 2, 2009
File Front the completed folder of the model
http://files.filefront.com/arch1392+assignment+2zip/;13698996;/fileinfo.html
Friday, May 1, 2009
Progress after week 7
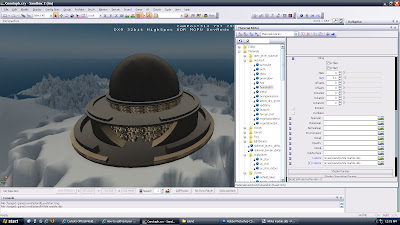
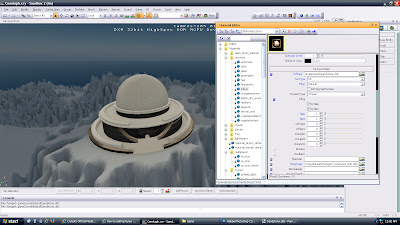
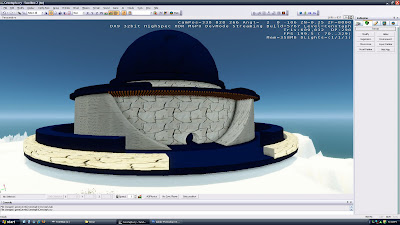
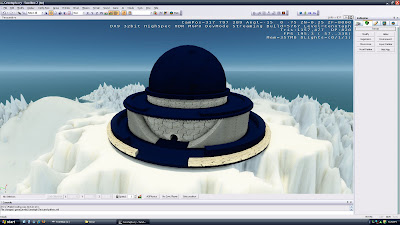
After the advice from Jeremy and Graham in week 7 studio, we realized that the weakness and insufficient of our model. As the previous model is an ArchiCAD model which created by Joanne, and we both reckon that it would take extra time if we go back and fix it in ArchiCAD, then export it again to 3Ds Max, then Crysis; so I suggested that I can re-build it in 3Ds Max straight forward instead of going back to ArchiCAD. It finally took me 6-7 hours to do it, but I think it really worth, as the model looks better and close to the original drawing; moreover, I add all the details (slabs, holes and plant) to the model and make it looks more elegant. Another benefit is I can edit the material easier, as each element of the model is independent and can be selected and apply material separately; instead of the model imported from ArchiCAD, all layers and elements are merged and cannot be edited individually.
Here are some pictures which I captured during the re-build progress.


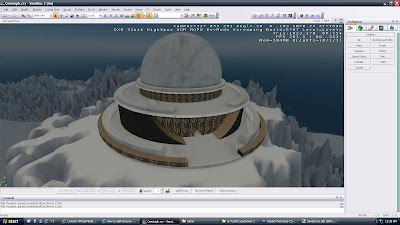
And some render pictures of the model by using 3Ds Max


Entrance of the model

Here are some pictures which I captured during the re-build progress.


And some render pictures of the model by using 3Ds Max


Entrance of the model

Subscribe to:
Posts (Atom)